I made this dough for a little pizza-making event, and it was a huge hit. It's thin, crispy, and totally delicious. It's one of the easiest breads I've ever made, as it requires almost no kneading and really very little work altogether. It needs to be made at least a day in advance and sit in the fridge overnight. Best of all, the topped pizzas only take 5-8 minutes to bake.
You'll need:
4 1/2 cups flour, chilled
1 3/4 teaspoons salt
1 teaspoon instant yeast (rapid rise)
1/4 cup olive oil
1 3/4 cups water, ice cold (40°F)
Cornmeal for dusting
Pizza stone
In advance:
1. Stir together the flour, salt, and instant yeast in a 4-quart bowl (or in the bowl of an electric mixer). With a large metal spoon, stir in the oil and the cold water until the flour is all absorbed (or mix on low speed with the paddle attachment), If you are mixing by hand, repeatedly dip one of your hands or the metal spoon into cold water and use it, much like a dough hook, to work the dough vigorously into a smooth mass while rotating the bowl in a circular motion with the other hand. Reverse the circular motion a few times to develop the gluten further. Do this for 5 to 7 minutes, or until the dough is smooth and the ingredients are evenly distributed. If you are using an electric mixer, switch to the dough hook and mix on medium speed for 5 to 7 minutes, or as long as it takes to create a smooth, sticky dough. The dough should clear the sides of the bowl but stick to the bottom of the bowl. If the dough is too wet and doesn't come off the sides of the bowl, sprinkle in some more flour just until it clears the sides. If it clears the bottom of the bowl, dribble in a tea- spoon or two of cold water. The finished dough will be springy, elastic, and sticky, not just tacky, and register 50 to 55F.
2. Sprinkle flour on the counter and transfer the dough to the counter. Prepare a sheet pan by lining it with baking parchment and misting the parchment with spray oil (or lightly oil the parchment). Using a metal dough scraper, cut the dough into 6 equal pieces (or larger if you are comfortable shaping large pizzas), You can dip the scraper into the water between cuts to keep the dough from sticking to it, Sprinkle flour over the dough. Make sure your hands are dry and then flour them. Lift each piece and gently round it into a ball. If the dough sticks to your hands, dip your hands into the flour again. Transfer the dough balls to the sheet pan, Mist the dough generously with spray oil and slip the pan into a food-grade plastic bag (or cover in plastic wrap).
3. Put the pan into the refrigerator overnight to rest the dough, or keep for up to 3 days. (Note: If you want to save some of the dough for future baking, you can store the dough balls in a zippered freezer bag. Dip each dough ball into a bowl that has a few tablespoons of oil in it, rolling the dough in the oil, and then put each ball into a separate bag. You can place the bags into the freezer for up to 3 months. Transfer them to the refrigerator the day before you plan to make pizza.)
Day of:
4. On the day you plan to make the pizza, remove the desired number of dough balls from the refrigerator 2 hours before making the pizza. Before letting the dough rest at room temperature for 2 hours, dust the counter with flour, and then mist the counter with spray oil. Place the dough balls on top of the floured counter and sprinkle them with flour; dust your hands with flour. Gently press the dough into flat disks about 1/2 inch thick and 5 inches in diameter. Sprinkle the dough with flour, mist it again with spray oil, and cover the dough loosely with plastic wrap or a food-grade plastic bag. Now let rest for 2 hours.
4. On the day you plan to make the pizza, remove the desired number of dough balls from the refrigerator 2 hours before making the pizza. Before letting the dough rest at room temperature for 2 hours, dust the counter with flour, and then mist the counter with spray oil. Place the dough balls on top of the floured counter and sprinkle them with flour; dust your hands with flour. Gently press the dough into flat disks about 1/2 inch thick and 5 inches in diameter. Sprinkle the dough with flour, mist it again with spray oil, and cover the dough loosely with plastic wrap or a food-grade plastic bag. Now let rest for 2 hours.
5. At least 45 minutes before making the pizza, place a baking stone either on the floor of the oven (for gas ovens), or on a rack in the lower third of the oven. Heat the oven as hot as possible, up to 800F (most home ovens will go only to 500 to 550F, but some will go higher). If you do not have a baking stone, you can use the back of a sheet pan, but do not preheat the pan.
6. Generously dust a peel or the back of a sheet pan with semolina flour or cornmeal. Make the pizzas one at a time. Dip your hands, including the backs of your hands and knuckles, in flour and lift I piece of dough by getting under it with a pastry scraper. Very gently lay the dough across your fists and carefully stretch it by bouncing the dough in a circular motion on your hands, carefully giving it a little stretch with each bounce. If it begins to stick to your hands, lay it down on the floured counter and reflour your hands, then continue shaping it. Once the dough has expanded outward, move to a full toss as shown on page 208. If you have trouble tossing the dough, or if the dough keeps springing back, let it rest for 5 to 20 minutes so the gluten can relax, and try again. You can also resort to using a rolling pin, though this isn't as effective as the toss method.
7. When the dough is stretched out to your satisfaction (about 9 to 12 inches in diameter for a 6-ounce piece of dough), lay it on the peel or pan, making sure there is enough semolina flour or cornmeal to allow it to slide. Lightly top it with sauce and then with your other top- pings, remembering that the best pizzas are topped with a less-is-more philosophy. The American "kitchen sink" approach is counterproductive, as it makes the crust more difficult to bake. A few, usually no more than 3 or 4 toppings, including sauce and cheese is sufficient.
8. Slide the topped pizza onto the stone (or bake directly on the sheet pan) and close the door. Wait 2 minutes, then take a peek. If it needs to be rotated 180 degrees for even baking, do so. The pizza should take about 5 to 8 minutes to bake. If the top gets done before the bottom, you will need to move the stone to a lower self before the next round. if the bottom crisps before the cheese caramelizes, then you will need to raise the stone for subsequent bakes.
9. Remove the pizza from the oven and transfer to a cutting board. Wait 3 to 5 minutes before slicing and serving, to allow the cheese to set slightly.
Makes six 6-ounce pizza crusts.
[Lifted from]
Wednesday, December 16, 2009
Friday, December 11, 2009
Chicken In Milk & Cinnamon & Garlic & Lemon

OK, so this is a weird recipe. It involves roasting a chicken in milk and some other stuff. The milk sort of curdles.
But y'know what? It also happens to be amazingly delicious. Tender, zingy, zesty, flavorful, moist... and you get some great broth out of it.
Here goes:
1 whole chicken
Sea salt and freshly ground black pepper
115g/4oz or ½ a pack of butter
Olive oil
1/2 cinnamon stick
1 good handful of fresh sage, leaves picked
Zest of 2 lemons
10 cloves of garlic, skin left on
565ml/1 pint milk
Sea salt and freshly ground black pepper
115g/4oz or ½ a pack of butter
Olive oil
1/2 cinnamon stick
1 good handful of fresh sage, leaves picked
Zest of 2 lemons
10 cloves of garlic, skin left on
565ml/1 pint milk
Preheat the oven to 375°, and find a snug-fitting pot for the chicken. Season it generously all over, and fry it in the butter and a little olive oil, turning the chicken to get an even colour all over, until golden. Remove from the heat, put the chicken on a plate, and reserve the oil and butter left in the pot. This will leave you with tasty sticky goodness at the bottom of the pan which will give you a lovely caramelly flavour later on.
Put your chicken back in the pot with the rest of the ingredients, and cook in the preheated oven for 1½ hours.* Baste with the cooking juice when you remember. The lemon zest will sort of split the milk, making a sauce which is absolutely fantastic.
To serve, pull the meat off the bones and divide it on to your plates. Spoon over plenty of juice and the little curds. Serve with wilted spinach or greens and some mashed potato.
*Note: the recipe doesn't mention whether or not to cover the chicken. We covered it for most of the baking time, to delicious effect.
[Source]
Tuesday, December 1, 2009
Delectable Pumpkin Holiday Soup Surprise
For friend's thanksgiving this year, Darren was inspired by the lesser known, yet surprisingly potent aphrodisiac, pumpkin. We whipped up this soup, borrowed line by line from The Greens Cookbook, by Deborah Madison.
STOCK
Seeds and scrapings from inside pumpkin or squash
2 carrots, peeled and diced
1 celery stock + leaves, diced
1 turnip, peeled and diced
2 bay leaves
½ t. dried sage leaves or 5-6 fresh sage leaves
4 parsley branches
3 thyme branches
½ t. salt
8 cups cold water (we could have used more stock, the soup was really thick, I would add more water here)
1 pumpkin or squash weighing about 2 ½ pounds. They suggest sugar pumpkins or any non-stringy squash with a delicious flavor
3 T. butter
1 medium yellow onion, diced
½-1 t. salt
6-7 cups of previously mentioned stock
½-1 C. light cream
White pepper (we used black)
3 oz. Gruyere cheese, finely grated
Thyme leaves for garnish
Monday, November 30, 2009
Honey Whole Wheat Bread
This is a really simple, really delicious wheat bread. It makes three loaves, but since the average person does not have three bread pans, feel free to make two loaves and experiment with the third (Rolls? Bread sticks? Baguettes? Other free-form breadery? Go nuts!).
I've made this three times, and each time I've increased the ratio of whole wheat flour to bread flour - one day I might just buck the odds and go 100% whole wheat. Thus far, 2:1 whole wheat to bread flour has worked really well, but I'll leave the recipe as is:
You'll need:
3 cups warm water (110 degrees F/45 degrees C)
2 packages active dry yeast
1/3 cup honey
5 cups bread flour
3 tablespoons butter, melted
1/3 cup honey
1 tablespoon salt
3 1/2 cups whole wheat flour
2 tablespoons butter, melted
Then do this:
In a large bowl, mix warm water, yeast, and 1/3 cup honey. Add 5 cups white bread flour, and stir to combine. Let set for 30 minutes, or until big and bubbly.
Mix in 3 tablespoons melted butter, 1/3 cup honey, and salt. Stir in 2 cups whole wheat flour. Flour a flat surface and knead with whole wheat flour until not real sticky - just pulling away from the counter, but still sticky to touch. This may take an additional 2 to 4 cups of whole wheat flour. Place in a greased bowl, turning once to coat the surface of the dough. Cover with a dishtowel. Let rise in a warm place until doubled.
Punch down, and divide into 3 loaves. Place in greased 9 x 5 inch loaf pans, and allow to rise until dough has topped the pans by one inch.
Bake at 350 degrees F (175 degrees C) for 25 to 30 minutes; do not overbake. Lightly brush the tops of loaves with 2 tablespoons melted butter or margarine when done to prevent crust from getting hard. Cool completely.
[Source]
Dutch Babies
This is a SUPER easy and yummy breakfast dish. It can be served sweet with maple syrup, or you could make it savory and add some eggs, mushrooms, etc.
Preheat oven to 425
5 eggs
1/2 cup butter
1 1/4 cup milk
1 1/4 cup flour
put butter in two pie dishes and melt (place in oven while preheating)
put in a blender:
eggs
milk
flour - 1/4 cup at a time
blend for less than 2 min
pour into pie dishes
bake for 20-25 min
Preheat oven to 425
5 eggs
1/2 cup butter
1 1/4 cup milk
1 1/4 cup flour
put butter in two pie dishes and melt (place in oven while preheating)
put in a blender:
eggs
milk
flour - 1/4 cup at a time
blend for less than 2 min
pour into pie dishes
bake for 20-25 min
Wednesday, November 25, 2009
Butternut Squash, Caramelized Onions, Gorganzola and Sage
This is a delicious side dish I found on a charming blog called, Closet Kitchen. The dish is quite simple although cooking the squash and caramelizing the onions takes about an hour so plan ahead. I have doubled the recipe which I think is better because I think his serving sizes are rather small. My favorite part of making this dish is when you add all the ingredients together at the end. The bright orange of the squash with the golden onions and the green sage is just fantastic! I hope you enjoy it as much as I do.
Ingredients:
2 butternut squash chopped into 1/2 inch cubes
2 yellow onions, thinly sliced
2 garlic cloves
Approximately 2 bunches of fresh sage
Approximately 4 oz. Gorgonzola cheese
3 to 4 tablespoons butter
Olive oil
salt and pepper
1.) Spread squash in a baking pan and toss with olive oil, salt and pepper and bake in the oven at 350 for 30 to 40 minutes until cooked.
2.) Meanwhile, melt two tablespoons butter with two tablespoons olive oil in a large pan. Add the sliced onions. Cook until soft for about 5 to 10 minutes and then reduce heat and let caramelize, stirring occasionally. This will probably take about 35 to 40 minutes. Do not let the pan get too hot because you don't want the onions to get to brown and crunch. They will reduce significantly and will very soft and a lovely golden brown color.
3.) When onions are caramelized, add the chopped garlic and let cook for a few minutes. Removed from heat.
4.) I remove the onions and garlic and put into a bowl while I deal with the sage in the same pan. Why dirty another pan??
5.) Brown a tablespoon of butter in the pan. Add the sage and cook until the sage is crispy, but not burnt. Watch them closely.
6.) Then, add the squash and onions back into the pan with the sage and add the Gorgonzola. Give it a few good stirs and serve!
Sunday, November 22, 2009
Pistachio (and cashew) encrusted chicken
This is my new favorite way to cook chicken - encrusted in delicious, salty-sweet, nutty deliciousness. The recipe calls for only pistachios, but the last time I made this I replaced half of them with cashews, and it was even better. This is very easy and will impress and delight your friends and family, which is very important.
2 tablespoons mustard
2 tablespoons olive oil
2 tablespoons honey
salt and pepper to taste
2 large skinless, boneless chicken breast halves, cut into 1-inch strips
Then do this:
Preheat oven to 500 degrees. Lightly coat a baking sheet with cooking spray, oil or butter. Mix together pistachios and bread crumbs in a shallow bowl. In a separate bowl, stir together mustard, olive oil, honey, salt and pepper until smooth. Dip chicken into mustard mixture to coat, then coat with bread crumb mixture. Place onto prepared baking sheet.
Place into preheated oven and turn the oven down to 375 degrees. Bake until the chicken is no longer pink and the pistachio coating is golden brown, about 20 minutes.
[Source]
You'll need:
1 cup chopped pistachios (or 1/2 C pistachios, 1/2 C cashews)
1/2 cup bread crumbs (those not into gluten/wheat can just omit these)2 tablespoons mustard
2 tablespoons olive oil
2 tablespoons honey
salt and pepper to taste
2 large skinless, boneless chicken breast halves, cut into 1-inch strips
Then do this:
Preheat oven to 500 degrees. Lightly coat a baking sheet with cooking spray, oil or butter. Mix together pistachios and bread crumbs in a shallow bowl. In a separate bowl, stir together mustard, olive oil, honey, salt and pepper until smooth. Dip chicken into mustard mixture to coat, then coat with bread crumb mixture. Place onto prepared baking sheet.
Place into preheated oven and turn the oven down to 375 degrees. Bake until the chicken is no longer pink and the pistachio coating is golden brown, about 20 minutes.
[Source]
Saturday, November 21, 2009
Pan-Roasted Pork Chops with Cranberries and Chard
Yeah, I know - it sounds really fancy. It looks really fancy. Certain parts of the recipe have "fancy" written all over them, in deep red cranberry ink. But in the end, it's a pretty easy recipe, as long as you have the following things: a cast-iron pan, some good red wine, and an abiding love for all that is delicious. You should also not be a vegetarian to enjoy this meal.
1/3 cup minced shallots (2 medium)
1 tablespoon minced garlic
2 tablespoons unsalted butter
1 lb red Swiss chard, stems and center ribs cut out and chopped together, leaves coarsely chopped separately
For pork chops
4 (1 1/4-inch-thick) rib pork chops
1 1/2 tablespoons extra-virgin olive oil
For sauce
1/3 cup minced shallots (2 medium)
1/2 cup dry red wine
1 cup fresh or thawed frozen cranberries (4 1/2 oz)
3/4 cup chicken stock or broth
3 tablespoons packed light brown sugar
1 1/2 teaspoons chopped fresh thyme or 1/2 teaspoon dried, crumbled
2 tablespoons unsalted butter
Preheat oven to 400°F.
For the chard:
Cook shallots and garlic in butter in an ovenproof 12-inch heavy skillet over moderate heat, stirring, until golden, about 5 minutes. Add chard stems and center ribs and cook, covered, stirring occasionally, until crisp-tender, 3 to 4 minutes. Add leaves and cook, uncovered, stirring occasionally, until tender, 6 to 7 minutes. Season with salt and pepper, then transfer chard to a heavy saucepan and wipe out skillet.
Cook pork chops:
Pat chops dry and season with salt and pepper. Heat oil in skillet over moderately high heat until hot but not smoking, then brown chops, about 3 minutes per side.
Transfer skillet to oven and roast until an instant-read thermometer inserted horizontally 2 inches into meat registers 155°F, 7 to 9 minutes. Transfer chops with tongs to a platter, leaving fat in skillet, and cover chops loosely with foil to keep warm.
Make sauce:
Sauté shallots in fat remaining in skillet over moderately high heat, stirring, until golden, about 5 minutes. Add wine and deglaze by boiling over high heat, scraping up brown bits, until reduced by half. Add cranberries and stock and simmer, stirring occasionally, until cranberries begin to burst, about 2 minutes. Stir in brown sugar and thyme and simmer, stirring, until berries are collapsed, about 3 minutes. Remove from heat and stir in butter until incorporated, then season with salt and pepper.
Assemble dish:
While sauce is cooking, reheat chard over moderate heat, stirring. Divide among 4 plates and top with chops, then spoon sauce over.
Seriously, though, it's incredibly delicious and pretty impressive to prepare, and is not very difficult at all. I served these with some crusty puffed potatoes, and, well, let's just say rounds of applause were involved.
Here is what you'll need - and this is a recipe where I highly recommend the method of making little prep bowls of all ingredients, cut and measured out beforehand:
For the chard (any kind, really) -
1/3 cup minced shallots (2 medium)
1 tablespoon minced garlic
2 tablespoons unsalted butter
1 lb red Swiss chard, stems and center ribs cut out and chopped together, leaves coarsely chopped separately
For pork chops
4 (1 1/4-inch-thick) rib pork chops
1 1/2 tablespoons extra-virgin olive oil
For sauce
1/3 cup minced shallots (2 medium)
1/2 cup dry red wine
1 cup fresh or thawed frozen cranberries (4 1/2 oz)
3/4 cup chicken stock or broth
3 tablespoons packed light brown sugar
1 1/2 teaspoons chopped fresh thyme or 1/2 teaspoon dried, crumbled
2 tablespoons unsalted butter
Now for the actual making of the dish:
Preheat oven to 400°F.
For the chard:
Cook shallots and garlic in butter in an ovenproof 12-inch heavy skillet over moderate heat, stirring, until golden, about 5 minutes. Add chard stems and center ribs and cook, covered, stirring occasionally, until crisp-tender, 3 to 4 minutes. Add leaves and cook, uncovered, stirring occasionally, until tender, 6 to 7 minutes. Season with salt and pepper, then transfer chard to a heavy saucepan and wipe out skillet.
Cook pork chops:
Pat chops dry and season with salt and pepper. Heat oil in skillet over moderately high heat until hot but not smoking, then brown chops, about 3 minutes per side.
Transfer skillet to oven and roast until an instant-read thermometer inserted horizontally 2 inches into meat registers 155°F, 7 to 9 minutes. Transfer chops with tongs to a platter, leaving fat in skillet, and cover chops loosely with foil to keep warm.
Make sauce:
Sauté shallots in fat remaining in skillet over moderately high heat, stirring, until golden, about 5 minutes. Add wine and deglaze by boiling over high heat, scraping up brown bits, until reduced by half. Add cranberries and stock and simmer, stirring occasionally, until cranberries begin to burst, about 2 minutes. Stir in brown sugar and thyme and simmer, stirring, until berries are collapsed, about 3 minutes. Remove from heat and stir in butter until incorporated, then season with salt and pepper.
Assemble dish:
While sauce is cooking, reheat chard over moderate heat, stirring. Divide among 4 plates and top with chops, then spoon sauce over.
[source]
Friday, November 20, 2009
Gingersnap Pear Cheesecake!

I don't know why I've never really made cheesecake before. Although, I'm good at sitting down on Sunday and planning out my dinners for the week, I desserts are spur of the moment decisions, based on a craving. Cheesecakes never really made the cut since I have to delay gratification for a whole day while it sits and settles. But, I figured that eating the batter and leftover cookie crumbs would be enough to satiate me for the evening, and I set out on making this variation of cheesecake - with a gingersnap crust and pear bottom.
The full recipe is on RealSimple.com, but here is generally what you need to do!
For the crust...mix 1 1/2 cups of crushed gingernaps (I think I used more) and 6 tbsp of butter (melted) in a medium bowl. Use this mixure to line a springform pan for the crust. Bake for 20min at 350 degrees.
Peel, core and slice thinly 2 ripe pears and toss with 1/4 tsp of ground ginger - set aside.
With an electric mixer, beat 16 ounces (2 packages) of cream cheese on medium for 2 minutes. Add 1 cup of sugar and beat for another 2 minutes. Add 2 eggs, 1 at a time, until combined. Stir in 2 tsp of vanilla.
Line the pears on the bottom of the cooled crust, then pour in the cream cheese mixture. Bake for about 50 minutes at 350 degrees. When finished, set on a wire rack, but leave the oven on.
For the 'icing' mix 1 cup of sour cream, 1/2 cup sugar, and 1 tsp of vanilla. Use a spatula to spread this over the cheesecake and bake for another 8 minutes.
Once it's done, let it come to room temperature, then cover and refrigerate for at least 4 hours.
One thing to note - the cream cheese, eggs, and sour cream should all be used at room temperature.
Enjoy!!
Crusty Puffed Potatoes
This is the simplest recipe I've ever seen, so simple and so unbelievably delicious that I'm pretty stunned I'd never tried it before. I'm strongly considering never cooking potatoes any other way.
Here's what you need:
- Some potatoes (recipe calls for small red ones, but I imagine most any kind will do)
- Some coarse salt (very important!)
- Some olive oil
Preheat your oven to 475 degrees. Cut the potatoes into small pieces (it's nice to make them vary in shape - they should all be in the general vicinity of one square inch or so, a little bigger is fine), and rub them down really well with olive oil.
Lay them out, skin side down, on a baking sheet - though if you have a rack, even better - and (now this is the most important part) sprinkle the cut sides generously with the salt. Let stand for 10 minutes or so, and then pop them in the oven for 20 minutes; increase the temperature to 500 degrees and cook for about 5 minutes more, or until puffy and golden.
These are pretty much the best potatoes you'll eat, puffy and golden and delicious. I kind of want them right now.
[Source]
And we're back
Ladies and Gentlemen, foodies and foodettes:
The time has come. We've all gone our separate ways, rekindled love affairs with other food blogs, and realized that the emptiness we've felt - we've ALL felt - can be traced back to a simple reason. It doesn't take a rocket scientist, nor does is take a rocket cook, to recognize that simple reason.
In short, we all miss Recipe-Go-Round. And rocket cooks don't exist. Yet.
So it is with great huzzahs and a tear in my eye that I redeclare this fine blog Open For Business, just in time for the holiday season. I have a full lineup of delicious meals to post myself - including puffed potatoes (ooh!), pistachio-encrusted chicken (aagh!), and gold-laced lobster kidneys (jk lol!).
Make something delicious recently? Post it. Make something awful? Post it, with revisions. And if the blog should die down again, or go dormant for a while, let us not fear - let us simply regroup again, and become stonger.
Go forth! Cook!
- Bret
Thursday, August 13, 2009
Custard Filled Fruit Tart

1 Cup flour
1 Tablespoon sugar
1/4 Teaspoon salt
1/4 Teaspoon grated lemon peel
1/2 Cup unsalted butter (not too cold)
1 Tablespoon water
1/2 Teaspoon vanilla extract
Mix flower, sugar, salt and lemon peel. (If you use salted butter, omit the salt here). Cut the butter into pats and work into flour mixture with clean hands or pastry blender until butter is in mostly cornmeal size pieces and mixture is beginning to hold together. Combine water and vanilla and work into flour-butter mixture, just until pastry is blended and will hold together if you press it.
Press into a 9-inch tart pan with removable bottom. before baking, set shell in freezer, covered in foil for a minimum of 30 minutes, preferably overnight.
Bake in re-heated 375 oven for about 25 minutes or until LIGHT golden brown.
PASTRY CREAM: makes 2 1/2 Cups
2 Cup Milk
1/3 Cup Flour
6 Tablespoons Sugar
6 Egg yokes
1 to 2 tablespoons butter
1 Teaspoon vanilla extract
1 Teaspoon grated lemon peel
Scald milk - (just under boiling). Mix flour and sugar in a heavy, mom-corroding saucepan. Beat egg yokes until think and light colored. Thoroughly and slowly, whisk hot milk into the flour and sugar and cook over medium heat, stirring constantly until the mixture has boiled for a minute or two.
Whisk a little of the mixture into the egg yokes to warm them and stir back into the flour mix (this is called tempering and is to make sure to not scramble the yokes). Mix well, being sure to incorporate all the flour mixture from the sides of the pan and cook over medium heat, stirring constantly, until pastry cream begins to hold a slight shape. It should cook to 170 degrees, important to cook thoroughly, but DO NOT EVER LET IT BOIL
Remove from heat, stir in butter then put through a medium fine strainer. Add vanilla and lemon, let cool, whisking occasionally so that a crust doesn't form
ASSEMBLY:
fruit
short crust pasty
pastry cream
cut up whatever fruit you want....but berries, stone fruit (peaches, plums etc) and kiwi fruit are the best
pour some cream into the base of the tart and then top with fruit in whatever pattern you want.
enjoy the extra cream with some extra fruit
ENJOY!
Thursday, May 14, 2009
Healthy and delicious eats
The latest and greatest in my quest for healthy cooking and eating:
As some of you know, I am participating in a “cleanse” of sorts. Don’t get alarmed. It does not involve cayenne or lemon juice or inhumane digestive craziness. But, it does involve avoiding cheese, meat, gluten, alcohol, sugar and other foods that make life worth living. I started this on Monday and I have actually been eating really, really delicious food! As I have mentioned on this blog before, one of my favorite cook books is Super Natural Cooking and I have been making recipes from this book a lot lately. The two recipes below are from this book and both are quite delicious and easy for weeknight meals. Enjoy!
Brown Rice, Garbanzo Beans, and Asparagus Salad with Tofu “Cream” Sauce
This is easy! Make a bunch of brown rice in the rice cooker (or wherever). While the rice is cooking chop one medium sized onion, three cloves garlic, and one large bunch of asparagus (about one inch pieces). Drain one can of garbanzo beans. In a large skillet, heat up enough olive oil to coat the pan (the inside of the pan – of courseJ). Add the beans and sauté until crackling and hot. Maybe 7 minutes? Add the onion and garlic and sauté until the onion is soft. Add the asparagus and cover the pan for a few minutes, until the asparagus is beautifully bright green. I am sure I added some sea seal somewhere in here. I probably added it several times to be honest. I never pass up an opportunity to add sea salt. Add in the rice and you are done, baby, done!
Now for the sauce – add to a blender: approximately 8 ounces tofu (silken would probably be best but I used firm and it was fine), a few tbsp water, a smashed cloves of garlic, juice from half a lemon, and sea salt. I blended it all together and added more of the ingredients to taste. It ends up kind of tasting like a lighter version of hummus. Mix into the salad and eat. Yumsters!
Brown Rice Bowl
Make brown rice. Great. Next…sauté thin tofu slabs on a nonstick skillet. I didn’t use an oil or anything and it was great. Heat until browned but still fluffy. Add to the rice. Add half an avocado, sesame seeds, a couple sliced green onions, and some dried seaweed to the rice bowl. Now you will make the sauce – Put into a small sauce pan the juice of one entire orange and half a lemon with two tablespoons sugar. Heat until it reaches a light boil. Add two tablespoons brown rice vinegar and two tablespoons soy sauce. Again heat until it reaches a gentle boil. Add the zest for the orange and lemon used before. Whisk, add to the rice bowl and enjoy the citrus deliciousness.
Tuesday, May 12, 2009
Simple White Bean dish
Last night I made a simple white bean dish that I got from one of my favorite new cookbooks, Super Natural Cooking. The recipe below is from this book with a couple of my own adjustments.
Making beans:
I have never actually bought dried beans before and made them myself, but this was so easy and cheap and delicious that I will probably start doing this all the time. Soak the beans overnight, or at least for five hours. After soaking, rinse them and put in a large pot. Add enough water to cover the beans by at least two or three times the volume of the beans. Add a chopped onion, carrot, and/or celery. You can also cook the beans without these extra veggies but I think they
make the beans even more yummy! Let the beans simmer until the tender. For the little white beans I used for this recipe it took about 50 minutes. Depending on the size and type of bean it could take much longer to cook. Once the beans only have about 15 minutes left, add a generous amount of sea salt to the simmering pot. You don’t want to add the salt too early or it will make the beans disintegrate a bit. Once they are done drain the beans and veggies together.
Little white bean dish:
Get a large frying pan and melt a hearty chunk of butter (about two tablespoons) in the pan. Add the beans in a single layer and let them fry. Cook for about 3 to 4 minutes on medium high heat on each side. You want the beans to get nice and crispy. At first I thought, why does it have to be a single layer? Well, the beans get crustier with a single layer and that means it is more delicious! Salt to taste. After the beans are nice and crusty add one chopped onion and 4 or 5 chopped cloves of garlic. Sautee until the onions get soft. Add 6 big leaves of chard. The chard stem should be chopped and the leaf cut into thin strips. Sautee until the chard has wilted,
not too long. That is it! When I was sautéing the onions with the beans I thought things were getting a little dry so I added some olive oil. Feel free to add it at any point during the process. Enjoy!
Monday, March 9, 2009
How to make mini ice cream cups at a restaurant
In the same category as the microwaveable chocolate cake - probably gross, but fun to try! Special note to Cristin: you will not like this.
Go out to eat at any restaurant with the word "waffle" or "pancake" in their name, and/or serving bacon strips in the morning. Many diners, sit-down places at truck stops, and some fast food places. Home will work, too, if you have some of the mini half-n-half cups.
Step 2
Order water. You need two big glasses on the table. Drink all the water. The server will bring water to you right away and usually you won't have to order it. Tell them you are thirsty and would like a big glass. Two big glasses at the table are necessary. You need ice water, not just water. Crushed ice is better. But cubes work too. You need two glasses of ice water for this. Don't order extra ice in your glass, the normal half ice and half water is best. Drink all the water. It's good for you! After drinking the water. you now have 2 big glasses each half filled with ice. Empty ice from one glass to another.
Read the rest here!
Tuesday, February 24, 2009
Spinach Salad
This is one of my favorite salads. Because it is made with spinach and not lettuce it actually saves pretty well and can be eaten the next day. Yum!
One bag spinach
One navel orange
One avocado
Salad Dressing
2 Tbs rice (or white wine) vinegar
1 Tbs veggie oil
1 tsp sesame oil (or more, if you like)
2 tsp grated ginger
3 or 4 chopped scallions
salt
Whisk salad dressing ingredients together. Add salt to taste.
Chop orange and avocado in big chunks. Add to spinach. Pour dressing over salad. Toss well and serve. Enjoy!
Thursday, February 19, 2009
Easy Beef Stroganoff
I haven't actually made this yet, but it looks awesome and easy and this used to be one of my favorite dishes - I have no good reason why I stopped making it years ago. Recipe from here.
6 Tbsp butter
1 pound of top sirloin or tenderloin, cut thin into 1-inch wide by 2 1/2-inch long strips
1/3 cup chopped shallots (can substitute onions)
1/2 pound cremini mushrooms, sliced
Salt to taste
Pepper to taste
1/8 teaspoon nutmeg
1/2 teaspoon of dry tarragon or 2 teaspoons of chopped fresh tarragon
1 cup of sour cream at room temperature
Melt 3 Tbsp of butter in a large skillet on medium heat. Increase the heat to high/med-high and add the strips of beef. You want to cook the beef quickly, browning on each side, so the temp needs to be high enough to brown the beef, but not so high as to burn the butter. You may need to work in batches. While cooking the beef, sprinkle with some salt and pepper. When both sides are browned, remove the beef to a bowl and set aside.
In the same pan, reduce the heat to medium and add the shallots. Cook the shallots for a minute or two, allowing them to soak up any meat drippings. Remove the shallots to the same bowl as the meat and set aside.
In the same pan, melt another 3 Tbsp of butter. Increase heat to medium high and add the mushrooms. Cook, stirring occasionally for about 4 minutes. While cooking, sprinkle the nutmeg and the tarragon on the mushrooms.
Reduce the heat to low and add the sour cream to the mushrooms. You may want to add a tablespoon or two of water to thin the sauce (or not). Mix in the sour cream thoroughly. Do not let it come to a simmer or boil or the sour cream will curdle. Stir in the beef and shallots. Add salt and pepper to taste.
Serve immediately over egg noodles, fettucine, potatoes, or rice. (Potatoes, rice, and wheat-free pasta are wheat-free options.)
Serves 4.
Monday, February 16, 2009
Pierogi Lazy-Man Style
It's cold and rainy outside. I had a hankering for lots and lots of starch. Where can you get both of these in mass quantities? Potatoes and pasta. To make everything even less healthy toss in some butter, shredded cheddar cheese, and sour cream. Now you are talking.
How to make ghetto pierogi:
Ingredients:
Half a pound of dried lasagna noodles
2-3 lbs of red potatoes, washed and quartered with the skin left on.
Sour Cream
1 stick of butter
1-2 White Onions, cut into rings
1.5 cups Cheddar Cheese, shredded
Milk
How To:
Put the taters in a pot with enough cold salted water to cover. Bring to a boil, and let 'em rip for about 10-15 minutes, or at least until you can easily poke 'em with a fork.
While the potatoes are cooking, boil some water and cook the lasagna noodles according to the package directions. Drain and cool off to the side or under cold water.
Pre-heat oven to 350˚
In a large sauce-pan over Med/Med-low heat melt the entire stick of butter, then add the onions and saute until they are limp (can't hold their shape).
Once the potatoes are done, drain them and then MASH! I use a big old spoon, you could use an immersion blender or food processor, however you want to do it. Add all of the shredded cheddar cheese, a half-cup of sour cream or some milk. Add some pepper and salt. Taste. Does it taste good? Yeah, awesome, keep on going. If not, what does it need? Bacon? Sure, why not. Throw some chopped bacon in or chives, it's your mashed potatoes.
Time to make the monstrosity. Put a little bit of the butter and onion mix on the bottom of a greased pan, so that it will be non-stick. Add a layer of lasagna noodles (probably 3). Dump some mashed potatoes on top, spread around with gigantic wooden spoon. layer some more onions and butter. Repeat! The top layer should be lasagna noodles covered by more butter and onions. You could also spread some more cheese on top if you want or bread crumbs, but I like to keep it simple with onion and butter.
Bake for 30 minutes!
Let cool a bit, then cut big slices and serve with pan-fried kielbasa, saurkraut and mustard.
MMMMMM, starchy cold-weather food.
I also like to take the ghetto-pierogi and fry in more butter after it has been cooked to make it extra crispy, but that is just me.
Sunday, February 15, 2009
Fried Sage Leaves
As a garnish, I fried fresh sage leaves in a little bit of olive oil in a skillet. I wouldn't fry them longer then 30 seconds, as they might burn. But, getting them to a slightly crunchy texture is key. be sure to have some paper towels ready to blot out the excess oil.
These literally melt in your mouth and can be used to garnish so many dishes!
These literally melt in your mouth and can be used to garnish so many dishes!
Sage and garlic infused chicken legs
When I'm at the meat counter and I'm thinking chicken, 9 times out of 10 I go for skinless-boneless chicken breast. Always a good choice, but then I wonder if I'm making assumptions about its superiority. Why is it that we so often ignore thighs and legs? And skin? Fatty, yes - but, it's not the worst thing we could be eating, right? I do my part to ignore fast food and fries, so I'm sure a litttttttle skin is alright sometimes.
And I'm so glad I did for this dish! One really great thing about buying chicken with skin on is that you can totally stuff things under the layer of skin, thus enhancing the flavor of your meat. For this dish, we used a cast iron skillet and rubbed a nice lemon olive oil all over the chicken legs and under the skin. Then we chopped a few (or 5) cloves of garlic and about 10 fresh sage leaves. We stuffed all of this under the skin, added sea salt and let it sit for a few minutes.
Before putting it in the over (350 for 15 minutes), we browned the skin in the cast iron skillet over high heat for about 5 minutes.
Buying good chicken def makes a difference, but having that layer of skin to capture all of the flavors of the garlic and sage proved to be the main factor that made this dish so memorable and delicious!
Chard/Beet/Mushroom Ragout
This is a relatively simple ragout of winter vegetables that goes well as a side for the polenta. We bought a bunch of chard that had different shades (orange, red, yellow, white) of stalk, which served as an inspiration to add the beets in. One thing to remember is to separate the stalks from the leaves on the chard - they take more time to cook and need to get started much sooner.
Basic guide:
-Before you get started - you need to roast the beets beforehand. To do this, just peel, chop, toss in some oil and throw in the oven (400 degrees worked ok) for about 35 minutes.
-Saute the stalks (chopped) with garlic and onion in olive oil for 5-7 minutes
-Add brown button (or any variety) of mushrooms to the mix
-Add a glug of red wine (which you should be drinking with this anyways)
-Once these are well on their way to being done, add in the leaves and cook on medium heat for about 10 minutes.
Serve as a side and enjoy!
Cream Cheese Polenta
Last night I think we managed to make the 'best meal ever.' I feel like if I was stuck on an island, this is the meal I'd want to eat everyday. I'm going to post the dish recipes individually, so you can pick and choose, if you want.
First is cream cheese polenta. I was looking around for a good polenta recipe a few months ago and came across this one. I didn't have parmesan cheese or any money to buy some, so I was inclined to try it with cream cheese instead and really don't think I'll ever go back! As you might imagine, cream cheese just compliments the creamy texture of polenta in such an amazing way.
Here are the ingredients:
1 cup corn meal
4 cups water
1/2 tsp salt
4 tbsp butter
1/4 cup cream cheese
1 tsp dried sage
s & p
Boil the water and add salt. Once it is ready, slowly wisk in the cornmeal a little bit at a time. Don't dump it all in at once or you'll never be able to wisk out the clumps. Once it's all incorporated, change to a wodden spoon and add in the butter. Cook like this (stirring frequently) for about 15 minutes. Next, stir in the cream cheese, sage and salt/pepper. Taste and add seasoning, then devour!
Tuesday, February 10, 2009
Pesto Quinoa
[Via Jessica, who is unable to post this due to a temporary restraining order filed against her by the Internet]
I found this recipe on 101cookbooks.com. I didn't have half of the ingredients that it called for so I made some adjustments and it ended up tasting delicious! I think the key is that pesto is delicious and when you spread every protein packed grain(?) of quinoa with it, is it bound to be tasty. Feel free to add or subtract ingredients as you see fit. I have been eating it for lunch this week and it is fairly healthy, tasty, and filling. Also, I think the roasted tomatoes are key. I have recently discovered that tomatoes are not the yucky, weird vegetable I always thought. When roasted, they really spruce up any salad, pasta sauce, or grain dish.
Enjoy!
Quinoa (make about two cups cooked)
¼ onion
¼ cube tofu (chopped into small, half-inch cubes)
Three plum tomatoes (quartered)
Frozen peas (about half a bag)
A few big spoonfuls of pesto
Grated parmesan cheese
Brown sugar
Olive oil
Sea salt
Mix together a hearty splash of olive oil, one spoonful brown sugar, and a bit of salt. Coat tomatoes with mixture, and place in oven at 350 degree, skin side down. Roast until collapsed and juicy (about 40 minutes).
Heat olive oil in pan and toast tofu until golden brown. Set aside.
Sautee onion in olive oil. Add quinoa and peas. Cook until sizzling. Add tofu. Turn off heat and add pesto. Stir until quinoa is thoroughly coated. Add tomatoes and finish it off with lightly grated parmesan cheese!
Tuesday, January 27, 2009
Pancakes!! No Wheat!!
1 cup almond meal
1 cup sorghum flour (or corn flour, buckwheat flour, non-wheat flour of your choice)
1 egg
3-4 tablespoons butter or non-refined coconut oil (spectrum sells organic virgin coconut oil that is very good for this purpose)
1/2 to 1 cup milk (I use raw whole milk)
1/8 cup 4% milk fat greek style yogurt (or other plain high protein yogurt with some fat)
1/4 tspn salt
Added's (I use the first three together usually, the rest are as you like to taste)
Cinnamon
Vanilla
Ginger
Nuts
Fruit
Crack
Mix flours together with spices and salt. Fold in yogurt and egg until thoroughly mixed. Add 1/2 cup milk and mix until consistent. The batter should be the consistency of... pumpkin soup! Thick, but liquid, not watery. Depending on what flour you use you may need more or less milk. Put a tablespoon of butter on your pan, spread it around, use a quarter cup measure to pour batter on to heated pan into size of pancake desired. Re-oil pan between each batch, and expect first batch of pancakes to stick, always. If adding fruit, earlier for dried fruit, later (like onto the batter in the pan) for wet fruit like fresh blueberries. I don't know how to add crack, you're on your own with that.
Sunday, January 25, 2009
Seared Tuna with Soba Noodles

Bret, I think it has been a month since I promised to submit more recipes... so here we go. Simple, fast and delicious. Make sure to get high quality, sashimi-grade tuna for this, since it will be pretty raw (for those living in Berkeley, Tokyo Fish Market is the place to go). I found the recipe on BBC's Good Food site.
- 1/2 lbs Hamachi tuna (fresh and almost wiggling)
- 4 tbsp sesame oil
- 4 tbsp sesame seeds (I used sesame salt, a mixture of black sesame seeds and coarse salt sold in Japanese markets)
- soba noodles
- 1 small cucumber, cut into matchsticks
- 4 spring onions, chopped
- 4 tbsp lemon juice
- 4 tbsp soy sauce (I used the one with less salt)
- 1-inch chunk of fresh ginger, finely grated or chopped
- 3 tbsp mirin
- 1 tbsp sugar
Drizzle the tuna with 1 tbsp sesame oil and season with salt and pepper. Roll in sesame seeds until coated. Heat a pan until very hot, sear the tuna on all sides and chill until using. Make sure not to overcook the fish, you want to achieve a nicely seared crust while keeping it raw in the center.
Boil the noodles in salt water, drain and rinse well in cold water. Divide noodles between bowls. Arrange the cucumbers and spring onions on top.
Mix the lemon juice, soy sauce, ginger, mirin, sugar and the remaining sesame oil to make a dressing. Slice the tuna and arrange on top of the noodles. Pour the dressing over and sprinkle with some sesame seeds.
Image (c) www.bbcgoodfood.com
Tuesday, January 20, 2009
Turkey Meatballs
I made these on Sunday and they turned out really delicious. I will include the recipe as it is written in the Joy of Cooking, with my substitutions in parenthesis. As you will see I made a lot of changes and it still turned out delicious. I mixed the meatballs with pasta, steamed carrots, and a yellow bell pepper. Quite tasty!
Saute 1/2 cup chopped onion with one cloves garlic in olive oil. Cook until translucent. (I used closer to one cup and the onions were a little toasty.)
In a bowl add:
onions from above
1 lb. ground turkey (1.4 lbs)
1 large egg
1/4 cup grated Parmesan (7 shakes from of parm from the bottle! Don't tell anyone:))
2 tablespoons milk (I only had buttermilk. I know it sounds crazy, but maybe it was the key to my success?)
2 tablespoons breadcrumbs (one slice toasted bread smashed with a rolling pin. I then realized I actually had bread crumbs and I added a hearty helping of that as well.)
1 tablespoon tomato paste (ketchup)
1 tablespoon fresh basil or 1 teaspoon dried basil
Sea salt and pepper
Mix it all up with your hands and thoroughly combine. Roll into 1 inch balls and roll into cornmeal. Heat oil in a large pan. Add meatballs and brown, about 10 minutes. I found that covering the pan with a lid helped things cook more evenly. And that is it!
Wednesday, January 14, 2009
Easy, delicious, beautiful, healthy 'chinese' cabbage salad
I've been thinking about the recent article in the nytimes that seems to be circulating around alot - The 11 foods you should be eating or something to that effect. Basically, ive been trying to incorporate them into my diet in fun & new ways as much as I can. I was somewhat inspired by the photo of red cabbage slaw/salad they featured, but thought I could do a little better. This salad, which can be a stand alone meal, is super yummy, colorful, cheap to make and very healthy. my boyfriend summed it up by saying, 'you feel like you're killing all the cancerous cells in your body when you eat this.' Let's hope so!
Here's what you need (adjust to how much you want to make)
Here's what you need (adjust to how much you want to make)
Red cabbage - chopped
Carrots - julienned
Daikon (japanese radish) - julienned
Green onion - chopped finely
Ginger root - chopped finely
Pumpkin seeds
Almond slivers
1 package of instant ramen - crushed into bitesized pieces
Cooked chicken (optional)
Dressing:
Sesame seed oil/salad oil/olive oil
Fish sauce or soy sauce or both!
1/2 of the seasoning package from the instant ramen
Instructions:
Simply chop all of the vegetables and mix them in a big bowl. If you are in a hurry, you can just crush the ramen noodles and add straight to the salad. Another interesting twist is to fry them for a few minutes with some butter until they are golden brown. For the dressing, I felt that 100% sesame would be too strong, so I used about 80% salad oil and 20% sesame. Then add just a few drops of fish sauce if you have it and a few drops of soy sauce. If you dont have fish sauce, I would totally invest in it - it's great to add to curries, stir fries and salads like this. it has a much richer taste than soy and you don't need nearly as much. I also added about 1/2 of the seasoning packet to the dressing for a kick.
This meal is great - from 1 head of cabbage, 3 carrots and 3/4 of a daikon, I've been able to make 8 meals! Yeahhh!
Thursday, January 8, 2009
Carnitas
Carnitas is basically meat candy: chewy, crispy, tender, sweet and savory. This recipe makes a pretty large batch, but carnitas are a pretty good excuse for a party. Also, foil care packages of the stuff will make you some fast friends. The quantities mentioned here are entirely from memory, and are loose guidelines anyway; the main keys to the recipe are abundant seasoning and the initial slow-cooking of the meat.
Ingredients:
1 boneless pork shoulder (5-6 lbs)
1 onion, peeled and halved
2 jalapenos, halved lengthwise
3-4 cloves garlic, peeled
3/4 cup orange juice
Juice from 2 limes
1/4 cup tequila
1 T. coriander seeds
1 T. (or less) cumin seeds
1 sprig fresh oregano or 1 T. dried
3 bay leaves
a sprinkle of brown sugar (optional)
2T or more good-quality lard or vegetable oil
Preheat oven to 275 degrees. Cut pork shoulder into 2" cubes, seperating and reserving any large pieces of fat. Put meat and fat into a roasting pan. Salt the meat generously, and add onion, garlic, jalapenos, coriander seeds, cumin seeds, oregano, bay leaves, and sugar (if using) to the pan. Cover with the orange juice, lime juice, and tequila, and add water if necessary so that the meat is almost submerged in liquid. Cover the roasting pan with foil, and bake for 2 or more hours, or until the meat is very tender and falls apart easily. Let cool slightly and remove the meat. Strain and reserve the cooking liquid. Use two forks or your hands to shred the meat into large pieces. Add the cooking liquid back to the meat.
Heat a cast iron skillet over medium-high heat and add enough of the pork and liquid to fit in one layer in the pan. The cooking liquid should boil and begin to reduce. When it is reduced to a syrupy consistency around the meat, you may need to add some vegetable oil or (yum) lard to the pan so that the meat fries and doesn't stick. Continue cooking until there is no liquid left and the meat begins to brown. Adjust the heat if necessary -- you should have shredded pieces of pork that are juicy inside and caramelized and crispy on the outside. Sprinkle with salt if necessary, but the reduced liquid should have enough seasoning.
Serve with soft corn tortillas, pinto beans, pickled red onions, and a green salsa if you like. Also napkins.
Wednesday, January 7, 2009
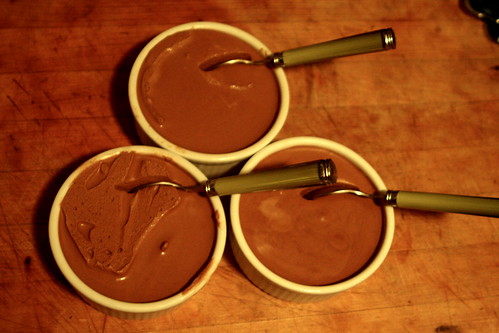
Insanely delicious chocolate truffles
This recipe comes courtesy my friend Abby, who makes these for Christmas every year. They're pretty damn easy, and will impress the hell out of your friends and family. Seriously, make these. Ok?
8 oz semisweet chocolate
1 oz bitter chocolate
3 egg yolks
1/2 c unsalted butter, cut into pieces
1/4 c myers rum or grand marnier
Unsweetened cocoa
Powdered sugar
1 - Chop chocolate into pieces, put in in a double broiler with the coffee, and melt, while stirring.
2 - In a separate bowl, beat egg yolks. Add 1/2 c chocolate mixture to them, beat well, and add back to the chocolate in the pan. Beat well for 2 minutes, let cool for 5 minutes, and then gradually beat in butter, one or two pieces at a time. Make sure no butter is visible, and add the rum/grand marnier.
3 - Refrigerate one and a half hours (or longer if you're making multiple recipes), until firm enough to do the next step.
4 - Scoop up truffles with a teaspoon and drop them onto a cookie sheet. They will be sticky blobs with no particular shape.
6 - Refrigerate for at least half an hour, but probably not more than an hour and a half.
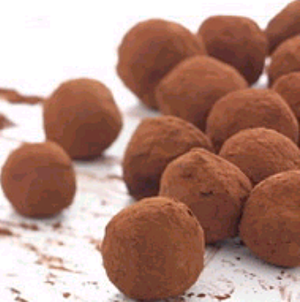
7 - Combine two parts cocoa and one part powered sugar in a lidded container (I like a glass jar). Probably 1/4 c cocoa and 1/8 c powered sugar will be enough. drop truffles into mix, put on lid, shake to coat, and the pluck them out and quickly roll them into a ball with the palms of your hands. Store in a sealed container in the fridge. I also sometimes keep a jar of cocoa/sugar around to freshen them up when needed.
Recipe for 4 dozen truffles (or 3 dozen if you make them a bit bulkier)
8 oz semisweet chocolate
1 oz bitter chocolate
3 egg yolks
1/2 c unsalted butter, cut into pieces
1/4 c myers rum or grand marnier
Unsweetened cocoa
Powdered sugar
1 - Chop chocolate into pieces, put in in a double broiler with the coffee, and melt, while stirring.
2 - In a separate bowl, beat egg yolks. Add 1/2 c chocolate mixture to them, beat well, and add back to the chocolate in the pan. Beat well for 2 minutes, let cool for 5 minutes, and then gradually beat in butter, one or two pieces at a time. Make sure no butter is visible, and add the rum/grand marnier.
3 - Refrigerate one and a half hours (or longer if you're making multiple recipes), until firm enough to do the next step.
4 - Scoop up truffles with a teaspoon and drop them onto a cookie sheet. They will be sticky blobs with no particular shape.
6 - Refrigerate for at least half an hour, but probably not more than an hour and a half.
7 - Combine two parts cocoa and one part powered sugar in a lidded container (I like a glass jar). Probably 1/4 c cocoa and 1/8 c powered sugar will be enough. drop truffles into mix, put on lid, shake to coat, and the pluck them out and quickly roll them into a ball with the palms of your hands. Store in a sealed container in the fridge. I also sometimes keep a jar of cocoa/sugar around to freshen them up when needed.
Thursday, January 1, 2009
Broiled Polenta with Winter Tomato Sauce
Made this on new year's eve, and it was totally delicious. We used regular cornmeal instead of the instant polenta, which took a long time but was totally worth it. Pretty easy recipe, would be even easier with instant.
Also, I'm not sure why it's a "winter tomato sauce." It's just a very basic tomato sauce, and honestly, you can probably make this polenta with any of your favorites sauces and it would be delicious. Maybe the recipe makers knew I was making this during the winter.
For the basic polenta:
4 cups water
1 teaspoon salt
1 cup cornmeal or instant polenta
1/4 pound Fontina cheese, preferable Italian, grated (about 1 cup)
2 tablespoons olive oil plus additional for brushing
1 large onion
1 garlic clove, chopped
a 28- to 32-ounce can whole tomatoes including juice
1 tablespoon chopped fresh parsley leaves (I didn't use any parsley...)
To prepare basic polenta:
In a heavy saucepan bring water and salt to a boil and gradually whisk in cornmeal in a thin stream. Cook polenta over moderately low heat (it should be barely boiling), stirring constantly, until very thick and pulls away from side of pan, about 40 minutes for cornmeal and about 15 minutes for instant polenta. Remove pan from heat and cover to keep warm. Stir polenta just before using. Polenta will keep warm, covered, about 20 minutes. Makes about 3 cups.
To prepare the polenta:
In a bowl stir together warm polenta and Fontina until smooth. Pour polenta into a lightly oiled shallow 1 1/2-quart bowl (or just a plate... it will be very solid) and cool. Polenta may be made 2 days ahead and chilled, covered.
To prepare sauce:
In a large skillet heat 2 tablespoons oil over moderately high heat until hot but not smoking and sauté onion with salt to taste, stirring, until golden and tender, about 10 minutes. Add garlic and sauté, stirring, 1 minute. Add tomatoes with juice, stirring to break up tomatoes, and simmer, covered, 30 minutes. Stir in parsley. Keep sauce warm.
Preheat broiler.
Unmold polenta onto a cutting board and cut into 3/4-inch-thick slices. Arrange slices in one layer in a lightly oiled shallow baking pan and brush slices with additional oil.
Broil polenta about 3 inches from heat until edges are golden, about 5 minutes. Turn polenta over and broil until edges are golden, about 3 minutes more.
Arrange polenta on a platter and spoon sauce over it. Enjoy!
Subscribe to:
Posts (Atom)