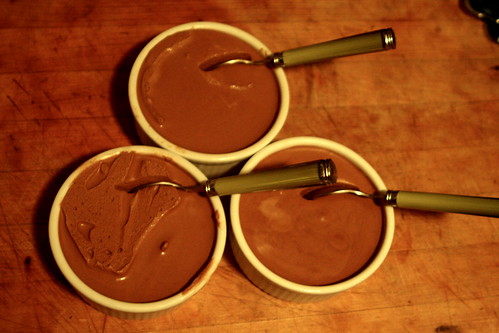
Sunday, December 11, 2011

Monday, February 15, 2010
Breakfast Sausage

Homemade Breakfast Sausage (serves 8)
Avoid lean or extra-lean ground pork; it makes the sausage dry, crumbly and less flavorful.
2 lbs ground pork
1 garlic clove, minced
1 tablespoon maple syrup
2 teaspoons dried sage
1/2 teaspoon dried thyme
1 teaspoon salt
1.5 teaspoons pepper
1/8 teaspoon cayenne pepper (I didn't actually use this...)
2 tablespoons unsalted butter
1. Mix Sausage
Combine pork, garlic, syrup, sage, thyme, salt, pepper, and cayenne in a large bowl. Gently mix with hands until well combined. Form mixture into 2.5-inch patties, about 1/2 inch thick. (You should have about 16 patties)
2. Brown Sausage
Melt 1 tablespoon butter in large nonstick skillet over medium heat. Cook half of patties until well browned and cooked through, 3-5 min per side. Transfer to paper towel-lined plate and tent with foil. Wipe out skillet. Repeat with remaining butter and patties. Serve.
Make ahead: The raw sausage patties can be refrigerated, covered, for 1 day or frozen for up to 1 month. To cook frozen patties, proceed with step 2, cooking patties for 7-9 min per side.
Saturday, January 9, 2010
Knead To Keep Busy Bread

My Grandpa was the only dentist in his small Iowa town of 2000 people. So everyone called him Doc. This is Grandpa Doc's famous bread recipe that he picked up as a hobby after retiring. He made a ton of it and would give it out to everyone in town. It is very wholesome, hearty and delicious. There are a lot of cool wheat ingredients. I suggest finding a bulk foods store to pick up most of these. Please note the key to this bread is giving it a lot of time to rise.
In large bowl mix:
2 ½ C white flour
1 C of the following:
2 T wheat germ
1 T wheat bran
(Use additional white flour to fill up cup if necessary)
1 tsp salt
2 packages yeast
In second bowl:
2 C stone ground whole wheat flour
1 C cracked wheat
Mix and set aside
In third bowl:
2 C white flour
Set aside
In sauce pan:
½ C packed dark brown sugar
½ stick soft margarine
2 ¾ C water
Heat contents in sauce pan to 100 degrees or test warm mixture on wrist. Pour ingredients into large bowl. Mix with wooden spoon. Add whole wheat flour (second bowl) and then white flour (third bowl) about a third at a time. Scrape sides of bowl and continue stirring until the ingredients are thoroughly blended and tend to form a ball that breaks away from the sides of the bowl. If the dough is very stiff, add a tiny bit of water.
Transfer the dough to a lightly floured surface. Knead until the dough (about 10 min) no longer feels sticky and has a smooth, satiny, elastic texture, adding more flour if necessary. Lightly grease large bowl, place dough in bowl and roll around so all sides are coated. Cover with cloth and set aside in warm place. The yeast must be pampered with constant warmth to keep it active. You can use a cool oven. Let dough rise until it has doubled in size (1 1/2 to 2 hrs), punch down dough and replace in cloth covered bowl for 20 min. Remove dough and cut into 3 equal parts. Place in 3 greased bowls for 10 more min. Remove, shape into 3 loaves and place in bread pans. Let rise an hour (at least). Place in preheated 350 degree oven. Bake 20-25 min. Remove from pans and place on rack to cool. Brush margarine on top.
Enjoy!
Greg
Wednesday, December 16, 2009
Delicious and easy pizza dough
You'll need:
4 1/2 cups flour, chilled
1 3/4 teaspoons salt
1 teaspoon instant yeast (rapid rise)
1/4 cup olive oil
1 3/4 cups water, ice cold (40°F)
Cornmeal for dusting
Pizza stone
In advance:
1. Stir together the flour, salt, and instant yeast in a 4-quart bowl (or in the bowl of an electric mixer). With a large metal spoon, stir in the oil and the cold water until the flour is all absorbed (or mix on low speed with the paddle attachment), If you are mixing by hand, repeatedly dip one of your hands or the metal spoon into cold water and use it, much like a dough hook, to work the dough vigorously into a smooth mass while rotating the bowl in a circular motion with the other hand. Reverse the circular motion a few times to develop the gluten further. Do this for 5 to 7 minutes, or until the dough is smooth and the ingredients are evenly distributed. If you are using an electric mixer, switch to the dough hook and mix on medium speed for 5 to 7 minutes, or as long as it takes to create a smooth, sticky dough. The dough should clear the sides of the bowl but stick to the bottom of the bowl. If the dough is too wet and doesn't come off the sides of the bowl, sprinkle in some more flour just until it clears the sides. If it clears the bottom of the bowl, dribble in a tea- spoon or two of cold water. The finished dough will be springy, elastic, and sticky, not just tacky, and register 50 to 55F.
2. Sprinkle flour on the counter and transfer the dough to the counter. Prepare a sheet pan by lining it with baking parchment and misting the parchment with spray oil (or lightly oil the parchment). Using a metal dough scraper, cut the dough into 6 equal pieces (or larger if you are comfortable shaping large pizzas), You can dip the scraper into the water between cuts to keep the dough from sticking to it, Sprinkle flour over the dough. Make sure your hands are dry and then flour them. Lift each piece and gently round it into a ball. If the dough sticks to your hands, dip your hands into the flour again. Transfer the dough balls to the sheet pan, Mist the dough generously with spray oil and slip the pan into a food-grade plastic bag (or cover in plastic wrap).
3. Put the pan into the refrigerator overnight to rest the dough, or keep for up to 3 days. (Note: If you want to save some of the dough for future baking, you can store the dough balls in a zippered freezer bag. Dip each dough ball into a bowl that has a few tablespoons of oil in it, rolling the dough in the oil, and then put each ball into a separate bag. You can place the bags into the freezer for up to 3 months. Transfer them to the refrigerator the day before you plan to make pizza.)
Day of:
4. On the day you plan to make the pizza, remove the desired number of dough balls from the refrigerator 2 hours before making the pizza. Before letting the dough rest at room temperature for 2 hours, dust the counter with flour, and then mist the counter with spray oil. Place the dough balls on top of the floured counter and sprinkle them with flour; dust your hands with flour. Gently press the dough into flat disks about 1/2 inch thick and 5 inches in diameter. Sprinkle the dough with flour, mist it again with spray oil, and cover the dough loosely with plastic wrap or a food-grade plastic bag. Now let rest for 2 hours.
4. On the day you plan to make the pizza, remove the desired number of dough balls from the refrigerator 2 hours before making the pizza. Before letting the dough rest at room temperature for 2 hours, dust the counter with flour, and then mist the counter with spray oil. Place the dough balls on top of the floured counter and sprinkle them with flour; dust your hands with flour. Gently press the dough into flat disks about 1/2 inch thick and 5 inches in diameter. Sprinkle the dough with flour, mist it again with spray oil, and cover the dough loosely with plastic wrap or a food-grade plastic bag. Now let rest for 2 hours.
5. At least 45 minutes before making the pizza, place a baking stone either on the floor of the oven (for gas ovens), or on a rack in the lower third of the oven. Heat the oven as hot as possible, up to 800F (most home ovens will go only to 500 to 550F, but some will go higher). If you do not have a baking stone, you can use the back of a sheet pan, but do not preheat the pan.
6. Generously dust a peel or the back of a sheet pan with semolina flour or cornmeal. Make the pizzas one at a time. Dip your hands, including the backs of your hands and knuckles, in flour and lift I piece of dough by getting under it with a pastry scraper. Very gently lay the dough across your fists and carefully stretch it by bouncing the dough in a circular motion on your hands, carefully giving it a little stretch with each bounce. If it begins to stick to your hands, lay it down on the floured counter and reflour your hands, then continue shaping it. Once the dough has expanded outward, move to a full toss as shown on page 208. If you have trouble tossing the dough, or if the dough keeps springing back, let it rest for 5 to 20 minutes so the gluten can relax, and try again. You can also resort to using a rolling pin, though this isn't as effective as the toss method.
7. When the dough is stretched out to your satisfaction (about 9 to 12 inches in diameter for a 6-ounce piece of dough), lay it on the peel or pan, making sure there is enough semolina flour or cornmeal to allow it to slide. Lightly top it with sauce and then with your other top- pings, remembering that the best pizzas are topped with a less-is-more philosophy. The American "kitchen sink" approach is counterproductive, as it makes the crust more difficult to bake. A few, usually no more than 3 or 4 toppings, including sauce and cheese is sufficient.
8. Slide the topped pizza onto the stone (or bake directly on the sheet pan) and close the door. Wait 2 minutes, then take a peek. If it needs to be rotated 180 degrees for even baking, do so. The pizza should take about 5 to 8 minutes to bake. If the top gets done before the bottom, you will need to move the stone to a lower self before the next round. if the bottom crisps before the cheese caramelizes, then you will need to raise the stone for subsequent bakes.
9. Remove the pizza from the oven and transfer to a cutting board. Wait 3 to 5 minutes before slicing and serving, to allow the cheese to set slightly.
Makes six 6-ounce pizza crusts.
[Lifted from]
Friday, December 11, 2009
Chicken In Milk & Cinnamon & Garlic & Lemon

OK, so this is a weird recipe. It involves roasting a chicken in milk and some other stuff. The milk sort of curdles.
Sea salt and freshly ground black pepper
115g/4oz or ½ a pack of butter
Olive oil
1/2 cinnamon stick
1 good handful of fresh sage, leaves picked
Zest of 2 lemons
10 cloves of garlic, skin left on
565ml/1 pint milk
Put your chicken back in the pot with the rest of the ingredients, and cook in the preheated oven for 1½ hours.* Baste with the cooking juice when you remember. The lemon zest will sort of split the milk, making a sauce which is absolutely fantastic.
To serve, pull the meat off the bones and divide it on to your plates. Spoon over plenty of juice and the little curds. Serve with wilted spinach or greens and some mashed potato.
[Source]
Tuesday, December 1, 2009
Delectable Pumpkin Holiday Soup Surprise
1 pumpkin or squash weighing about 2 ½ pounds. They suggest sugar pumpkins or any non-stringy squash with a delicious flavor
3 T. butter
1 medium yellow onion, diced
½-1 t. salt
6-7 cups of previously mentioned stock
½-1 C. light cream
White pepper (we used black)
3 oz. Gruyere cheese, finely grated
Thyme leaves for garnish
Monday, November 30, 2009
Honey Whole Wheat Bread
I've made this three times, and each time I've increased the ratio of whole wheat flour to bread flour - one day I might just buck the odds and go 100% whole wheat. Thus far, 2:1 whole wheat to bread flour has worked really well, but I'll leave the recipe as is:
You'll need:
3 cups warm water (110 degrees F/45 degrees C)
2 packages active dry yeast
1/3 cup honey
5 cups bread flour
3 tablespoons butter, melted
1/3 cup honey
1 tablespoon salt
3 1/2 cups whole wheat flour
2 tablespoons butter, melted
Then do this:
In a large bowl, mix warm water, yeast, and 1/3 cup honey. Add 5 cups white bread flour, and stir to combine. Let set for 30 minutes, or until big and bubbly.
Mix in 3 tablespoons melted butter, 1/3 cup honey, and salt. Stir in 2 cups whole wheat flour. Flour a flat surface and knead with whole wheat flour until not real sticky - just pulling away from the counter, but still sticky to touch. This may take an additional 2 to 4 cups of whole wheat flour. Place in a greased bowl, turning once to coat the surface of the dough. Cover with a dishtowel. Let rise in a warm place until doubled.
Punch down, and divide into 3 loaves. Place in greased 9 x 5 inch loaf pans, and allow to rise until dough has topped the pans by one inch.
Bake at 350 degrees F (175 degrees C) for 25 to 30 minutes; do not overbake. Lightly brush the tops of loaves with 2 tablespoons melted butter or margarine when done to prevent crust from getting hard. Cool completely.
[Source]
Dutch Babies
Preheat oven to 425
5 eggs
1/2 cup butter
1 1/4 cup milk
1 1/4 cup flour
put butter in two pie dishes and melt (place in oven while preheating)
put in a blender:
eggs
milk
flour - 1/4 cup at a time
blend for less than 2 min
pour into pie dishes
bake for 20-25 min
Wednesday, November 25, 2009
Butternut Squash, Caramelized Onions, Gorganzola and Sage
Ingredients:
2 butternut squash chopped into 1/2 inch cubes
2 yellow onions, thinly sliced
2 garlic cloves
Approximately 2 bunches of fresh sage
Approximately 4 oz. Gorgonzola cheese
3 to 4 tablespoons butter
Olive oil
salt and pepper
1.) Spread squash in a baking pan and toss with olive oil, salt and pepper and bake in the oven at 350 for 30 to 40 minutes until cooked.
2.) Meanwhile, melt two tablespoons butter with two tablespoons olive oil in a large pan. Add the sliced onions. Cook until soft for about 5 to 10 minutes and then reduce heat and let caramelize, stirring occasionally. This will probably take about 35 to 40 minutes. Do not let the pan get too hot because you don't want the onions to get to brown and crunch. They will reduce significantly and will very soft and a lovely golden brown color.
3.) When onions are caramelized, add the chopped garlic and let cook for a few minutes. Removed from heat.
4.) I remove the onions and garlic and put into a bowl while I deal with the sage in the same pan. Why dirty another pan??
5.) Brown a tablespoon of butter in the pan. Add the sage and cook until the sage is crispy, but not burnt. Watch them closely.
6.) Then, add the squash and onions back into the pan with the sage and add the Gorgonzola. Give it a few good stirs and serve!
Sunday, November 22, 2009
Pistachio (and cashew) encrusted chicken
2 tablespoons mustard
2 tablespoons olive oil
2 tablespoons honey
salt and pepper to taste
2 large skinless, boneless chicken breast halves, cut into 1-inch strips
Then do this:
Preheat oven to 500 degrees. Lightly coat a baking sheet with cooking spray, oil or butter. Mix together pistachios and bread crumbs in a shallow bowl. In a separate bowl, stir together mustard, olive oil, honey, salt and pepper until smooth. Dip chicken into mustard mixture to coat, then coat with bread crumb mixture. Place onto prepared baking sheet.
Place into preheated oven and turn the oven down to 375 degrees. Bake until the chicken is no longer pink and the pistachio coating is golden brown, about 20 minutes.
[Source]
Saturday, November 21, 2009
Pan-Roasted Pork Chops with Cranberries and Chard
1/3 cup minced shallots (2 medium)
1 tablespoon minced garlic
2 tablespoons unsalted butter
1 lb red Swiss chard, stems and center ribs cut out and chopped together, leaves coarsely chopped separately
For pork chops
4 (1 1/4-inch-thick) rib pork chops
1 1/2 tablespoons extra-virgin olive oil
For sauce
1/3 cup minced shallots (2 medium)
1/2 cup dry red wine
1 cup fresh or thawed frozen cranberries (4 1/2 oz)
3/4 cup chicken stock or broth
3 tablespoons packed light brown sugar
1 1/2 teaspoons chopped fresh thyme or 1/2 teaspoon dried, crumbled
2 tablespoons unsalted butter
Preheat oven to 400°F.
For the chard:
Cook shallots and garlic in butter in an ovenproof 12-inch heavy skillet over moderate heat, stirring, until golden, about 5 minutes. Add chard stems and center ribs and cook, covered, stirring occasionally, until crisp-tender, 3 to 4 minutes. Add leaves and cook, uncovered, stirring occasionally, until tender, 6 to 7 minutes. Season with salt and pepper, then transfer chard to a heavy saucepan and wipe out skillet.
Cook pork chops:
Pat chops dry and season with salt and pepper. Heat oil in skillet over moderately high heat until hot but not smoking, then brown chops, about 3 minutes per side.
Transfer skillet to oven and roast until an instant-read thermometer inserted horizontally 2 inches into meat registers 155°F, 7 to 9 minutes. Transfer chops with tongs to a platter, leaving fat in skillet, and cover chops loosely with foil to keep warm.
Make sauce:
Sauté shallots in fat remaining in skillet over moderately high heat, stirring, until golden, about 5 minutes. Add wine and deglaze by boiling over high heat, scraping up brown bits, until reduced by half. Add cranberries and stock and simmer, stirring occasionally, until cranberries begin to burst, about 2 minutes. Stir in brown sugar and thyme and simmer, stirring, until berries are collapsed, about 3 minutes. Remove from heat and stir in butter until incorporated, then season with salt and pepper.
Assemble dish:
While sauce is cooking, reheat chard over moderate heat, stirring. Divide among 4 plates and top with chops, then spoon sauce over.
Friday, November 20, 2009
Gingersnap Pear Cheesecake!

I don't know why I've never really made cheesecake before. Although, I'm good at sitting down on Sunday and planning out my dinners for the week, I desserts are spur of the moment decisions, based on a craving. Cheesecakes never really made the cut since I have to delay gratification for a whole day while it sits and settles. But, I figured that eating the batter and leftover cookie crumbs would be enough to satiate me for the evening, and I set out on making this variation of cheesecake - with a gingersnap crust and pear bottom.
For the crust...mix 1 1/2 cups of crushed gingernaps (I think I used more) and 6 tbsp of butter (melted) in a medium bowl. Use this mixure to line a springform pan for the crust. Bake for 20min at 350 degrees.
With an electric mixer, beat 16 ounces (2 packages) of cream cheese on medium for 2 minutes. Add 1 cup of sugar and beat for another 2 minutes. Add 2 eggs, 1 at a time, until combined. Stir in 2 tsp of vanilla.
For the 'icing' mix 1 cup of sour cream, 1/2 cup sugar, and 1 tsp of vanilla. Use a spatula to spread this over the cheesecake and bake for another 8 minutes.
One thing to note - the cream cheese, eggs, and sour cream should all be used at room temperature.
Crusty Puffed Potatoes
Here's what you need:
- Some potatoes (recipe calls for small red ones, but I imagine most any kind will do)
- Some coarse salt (very important!)
- Some olive oil
Preheat your oven to 475 degrees. Cut the potatoes into small pieces (it's nice to make them vary in shape - they should all be in the general vicinity of one square inch or so, a little bigger is fine), and rub them down really well with olive oil.
Lay them out, skin side down, on a baking sheet - though if you have a rack, even better - and (now this is the most important part) sprinkle the cut sides generously with the salt. Let stand for 10 minutes or so, and then pop them in the oven for 20 minutes; increase the temperature to 500 degrees and cook for about 5 minutes more, or until puffy and golden.
These are pretty much the best potatoes you'll eat, puffy and golden and delicious. I kind of want them right now.
[Source]
And we're back
The time has come. We've all gone our separate ways, rekindled love affairs with other food blogs, and realized that the emptiness we've felt - we've ALL felt - can be traced back to a simple reason. It doesn't take a rocket scientist, nor does is take a rocket cook, to recognize that simple reason.
In short, we all miss Recipe-Go-Round. And rocket cooks don't exist. Yet.
So it is with great huzzahs and a tear in my eye that I redeclare this fine blog Open For Business, just in time for the holiday season. I have a full lineup of delicious meals to post myself - including puffed potatoes (ooh!), pistachio-encrusted chicken (aagh!), and gold-laced lobster kidneys (jk lol!).
Make something delicious recently? Post it. Make something awful? Post it, with revisions. And if the blog should die down again, or go dormant for a while, let us not fear - let us simply regroup again, and become stonger.
Go forth! Cook!
- Bret
Thursday, August 13, 2009
Custard Filled Fruit Tart

Thursday, May 14, 2009
Healthy and delicious eats
As some of you know, I am participating in a “cleanse” of sorts. Don’t get alarmed. It does not involve cayenne or lemon juice or inhumane digestive craziness. But, it does involve avoiding cheese, meat, gluten, alcohol, sugar and other foods that make life worth living. I started this on Monday and I have actually been eating really, really delicious food! As I have mentioned on this blog before, one of my favorite cook books is Super Natural Cooking and I have been making recipes from this book a lot lately. The two recipes below are from this book and both are quite delicious and easy for weeknight meals. Enjoy!
Brown Rice, Garbanzo Beans, and Asparagus Salad with Tofu “Cream” Sauce
This is easy! Make a bunch of brown rice in the rice cooker (or wherever). While the rice is cooking chop one medium sized onion, three cloves garlic, and one large bunch of asparagus (about one inch pieces). Drain one can of garbanzo beans. In a large skillet, heat up enough olive oil to coat the pan (the inside of the pan – of courseJ). Add the beans and sauté until crackling and hot. Maybe 7 minutes? Add the onion and garlic and sauté until the onion is soft. Add the asparagus and cover the pan for a few minutes, until the asparagus is beautifully bright green. I am sure I added some sea seal somewhere in here. I probably added it several times to be honest. I never pass up an opportunity to add sea salt. Add in the rice and you are done, baby, done!
Now for the sauce – add to a blender: approximately 8 ounces tofu (silken would probably be best but I used firm and it was fine), a few tbsp water, a smashed cloves of garlic, juice from half a lemon, and sea salt. I blended it all together and added more of the ingredients to taste. It ends up kind of tasting like a lighter version of hummus. Mix into the salad and eat. Yumsters!
Brown Rice Bowl
Make brown rice. Great. Next…sauté thin tofu slabs on a nonstick skillet. I didn’t use an oil or anything and it was great. Heat until browned but still fluffy. Add to the rice. Add half an avocado, sesame seeds, a couple sliced green onions, and some dried seaweed to the rice bowl. Now you will make the sauce – Put into a small sauce pan the juice of one entire orange and half a lemon with two tablespoons sugar. Heat until it reaches a light boil. Add two tablespoons brown rice vinegar and two tablespoons soy sauce. Again heat until it reaches a gentle boil. Add the zest for the orange and lemon used before. Whisk, add to the rice bowl and enjoy the citrus deliciousness.
Tuesday, May 12, 2009
Simple White Bean dish
Making beans:
I have never actually bought dried beans before and made them myself, but this was so easy and cheap and delicious that I will probably start doing this all the time. Soak the beans overnight, or at least for five hours. After soaking, rinse them and put in a large pot. Add enough water to cover the beans by at least two or three times the volume of the beans. Add a chopped onion, carrot, and/or celery. You can also cook the beans without these extra veggies but I think they
make the beans even more yummy! Let the beans simmer until the tender. For the little white beans I used for this recipe it took about 50 minutes. Depending on the size and type of bean it could take much longer to cook. Once the beans only have about 15 minutes left, add a generous amount of sea salt to the simmering pot. You don’t want to add the salt too early or it will make the beans disintegrate a bit. Once they are done drain the beans and veggies together.
Little white bean dish:
Get a large frying pan and melt a hearty chunk of butter (about two tablespoons) in the pan. Add the beans in a single layer and let them fry. Cook for about 3 to 4 minutes on medium high heat on each side. You want the beans to get nice and crispy. At first I thought, why does it have to be a single layer? Well, the beans get crustier with a single layer and that means it is more delicious! Salt to taste. After the beans are nice and crusty add one chopped onion and 4 or 5 chopped cloves of garlic. Sautee until the onions get soft. Add 6 big leaves of chard. The chard stem should be chopped and the leaf cut into thin strips. Sautee until the chard has wilted,
not too long. That is it! When I was sautéing the onions with the beans I thought things were getting a little dry so I added some olive oil. Feel free to add it at any point during the process. Enjoy!
Monday, March 9, 2009
How to make mini ice cream cups at a restaurant
Go out to eat at any restaurant with the word "waffle" or "pancake" in their name, and/or serving bacon strips in the morning. Many diners, sit-down places at truck stops, and some fast food places. Home will work, too, if you have some of the mini half-n-half cups.
Tuesday, February 24, 2009
Spinach Salad
One bag spinach
One navel orange
One avocado
Salad Dressing
2 Tbs rice (or white wine) vinegar
1 Tbs veggie oil
1 tsp sesame oil (or more, if you like)
2 tsp grated ginger
3 or 4 chopped scallions
salt
Whisk salad dressing ingredients together. Add salt to taste.
Chop orange and avocado in big chunks. Add to spinach. Pour dressing over salad. Toss well and serve. Enjoy!
Thursday, February 19, 2009
Easy Beef Stroganoff
6 Tbsp butter
1 pound of top sirloin or tenderloin, cut thin into 1-inch wide by 2 1/2-inch long strips
1/3 cup chopped shallots (can substitute onions)
1/2 pound cremini mushrooms, sliced
Salt to taste
Pepper to taste
1/8 teaspoon nutmeg
1/2 teaspoon of dry tarragon or 2 teaspoons of chopped fresh tarragon
1 cup of sour cream at room temperature
Melt 3 Tbsp of butter in a large skillet on medium heat. Increase the heat to high/med-high and add the strips of beef. You want to cook the beef quickly, browning on each side, so the temp needs to be high enough to brown the beef, but not so high as to burn the butter. You may need to work in batches. While cooking the beef, sprinkle with some salt and pepper. When both sides are browned, remove the beef to a bowl and set aside.
In the same pan, reduce the heat to medium and add the shallots. Cook the shallots for a minute or two, allowing them to soak up any meat drippings. Remove the shallots to the same bowl as the meat and set aside.
In the same pan, melt another 3 Tbsp of butter. Increase heat to medium high and add the mushrooms. Cook, stirring occasionally for about 4 minutes. While cooking, sprinkle the nutmeg and the tarragon on the mushrooms.
Reduce the heat to low and add the sour cream to the mushrooms. You may want to add a tablespoon or two of water to thin the sauce (or not). Mix in the sour cream thoroughly. Do not let it come to a simmer or boil or the sour cream will curdle. Stir in the beef and shallots. Add salt and pepper to taste.
Serve immediately over egg noodles, fettucine, potatoes, or rice. (Potatoes, rice, and wheat-free pasta are wheat-free options.)
Serves 4.